January 30, 2013

Winter Wonderland-Whimsical Designs Reveal

So glad its already Wednesday, how about you?..  I get to share a layout with you created for Whimsical Wednesdays challenge reveal and for this week we were asked to make a project for our
 "WINTER WONDERLAND" challenge..  
We were  asked to add "SPARKLE AND SNOW FLAKES"
 I wanted to play with my Cameo and this is what I came up with:
I bought a crafting magazine about a week ago and it came with a DVD with digital images and papers by Nitwits.. I thought they were so cute and wanted to see how they would look printed and cut..
I think this layout turned out pretty cute..  I've noticed that using the cameo makes crafting pretty quick :)


so, how about some close ups:

The title is a digital image that came with this collection.. I was able to print and cut it using a few steps in the software, I found some how to videos on Pinterest and they really were useful..
I added lots of Diamond Stickles and then white pearl drops to add the SPARKLE..

I know its really difficult to see, but there is actually an image on those snowflakes.. but it ended up printing really light..

I also added lots of stickles to the side of the top note, the snow on the tree and the snow flakes on the flourish..

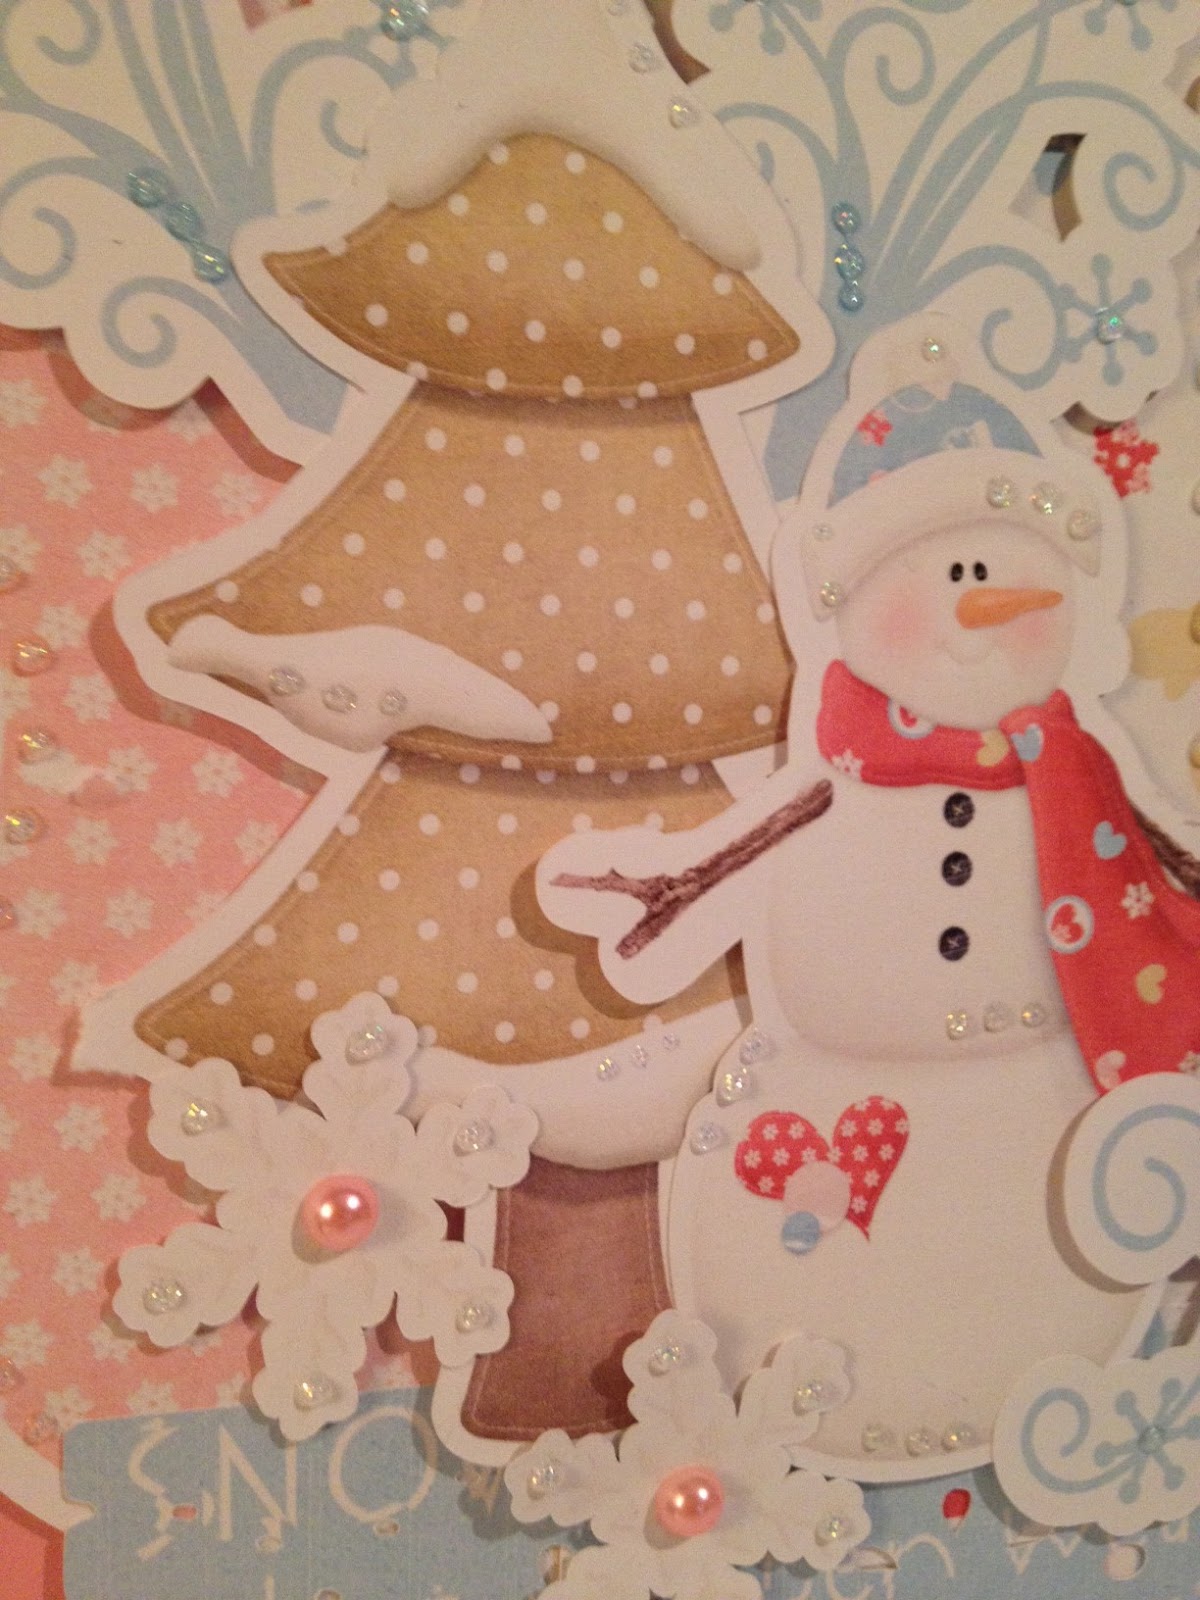
love this cute little snowman.. it was so quick to just print and cut him, instead of having to piece him together..

and finally the photo of my daughter.. Here in Finland when the sun shines during the winter days, its super cold outside.. but, I'd rather have it sunny and cold, than warmer and gloomy..  
I used the "BABY ITS COLD OUTSIDE" sentiment from the SNOW MUCH FUN  collection from Whimsical Designs stamps.  I stamped it on a piece of white cardstock, then cut it into pieces, gluing it on the side of the photo.. 

for supplies used:

Silhouette Cameo
Silhouette Design Studio software

Silhouette online store images:
Flourish and border

Nitwit digital papers:
Winter Collection

Nitwit Digital elements:
snowman, snowflakes, title and tree

Whimsical Designs Stamps:
Snow Much Fun collection

Diamond Stickles
white liquid pearl
Pearl halves: prima
foam tape

well fellow scrappers..  I'm so happy you stopped by today to check out what I've created as my Design Team project for Whimsical Wednesdays...
I hope you get a few times  and stop by to see what the other design team members have created for this challenge and if you're in the mood to scrap some winter photos, then do join in on the fun and submit your projects..
I hope everyone has a scraptastic week
Hugs

January 25, 2013

Believe in yourself-die cut reveal Jan 25th

Oh gosh!! I hope I get this written before my internet quits on me again.. 
Issues, issues, issues!!  just sick of having internet problems...  
But, not to bore you with my problems, instead I want to inspire you to get your die cutters out and get scrappin..LOL   This month was my month to host the challenges over at SOUS and I decided to challenge the girls with something different..
I asked the girls to created a project that had a 

"THEMED DECORATED WREATH AROUND THE PHOTO"

I had so much fun playing with my new Cameo and the software it comes with.. and let me tell you, this layout was one of the quickest I've ever created.. I love my Cameo..LOL
so, here is my take on this weeks challenge:

All of the die cuts I found in the Silhouette online store.. love that place by the way..LOL
I cut the frame as my wreath, adding stickles and snowflakes around it...

hows about a few close ups:

added some purple stickles randomly all over the layout to add some bling..

The snowflakes are welded to the shadow for easy print and cut.. love that feature!!

The tree is also an image I found at the online store.. added some purple stickels to that as well..

finally the bottom.. you can see a good close up of the stickles..
the Title is a phrase I got at the online store.. 

for supplies used:

white cardstock
printer

Silhouette Cameo
online store images

papers: Echo Park Digital prints
Purple stickles
MS edge punch
foam tape

well fellow scrappers...
 Do stop by SOUS and check out what amazing projects our Design team has created to inspire you with.
I want to thank you all so much for stopping by today and checking out what I've created for our die cut challenge.. 
I hope everyone has a scrap-tastic weekend..
hugs.

January 23, 2013

All About Love-Whimsical Wednesdays reveal

Happy hump day ladies.. I am so excited its Wednesday and this week we have an amazing  challenge for you at Whimsical Wednesdays.

For this weeks challenge we were asked to created a project that's
  "all about love"

I decided to once again create a layout of my husband Mike, but I have no good pictures of him..In most of his photos, he's either not facing me or he's topless and  holding a beer can..LOL  I decided to go with this photo, I have scrapped it before, but I love love love this photo of him..

ok. so with that said, here is my layout:

 I took lots of photos of this layout, but none of them turned out as good as I had hoped..
I apologize for the blurry picture..

 I took a lot of close ups though:

The title I found on the sweethearts cartridge.. 
I used my Martha Stewart edge punch on the trim.

Did some embossing on the big heart.. inked the edges and added some pink pearls

same embossing on the tree..added some white liquid pearl drops to the leaves which I attached using foam dots..

My flowers.. they are also on the Sweethearts cartridge..

What a sweet couple..LOL and the guy in the photo ain't half bad either..LOL


we were asked to use a sentiment from the Whimsical Designs With Love stamp set and I decided to use  "Everything is better with you by my side!"    I cut the stamp in half long ways to make it one long sentiment..
I did how ever accidentally stamp in lop sided..Grrrrr


for supplies used:

Whimsical Designs stamp set:  With Love

Cricut Imagine
Cricut Craftroom

cartridge:

Sweethearts:
Couple, heart, flowers, tree, photo corner and couple

Accent Essentials:
Leaves

Inks
chalks
pearls
MS edge punch
foam dots
White Cardstock
white gel pen

well fellow crafter's.. That's my Whimsical Wednesday's post for this week.. Do stop by and check out what amazing projects the other girls on the team have created.. and dont' forget about our BLOG HOP on the 1st of February.. There's going to a lot of fun prized to win, so write that down in your calenders..

Thank you for stopping by today and checking out what I've been up to..
hope everyone has a wonderfully scrappy week:
Hugs

January 16, 2013

Whimsical Wednesdays-Anything Goes Challenge

Hellow fellow crafters..
I am thrilled today that I get to share my first project for our Whimsical Wednesday come back.. Stephanie at WW decided to start off with a bang and having a challenge that is open to anything.. So, our challenge for today is "ANYTHING GOES".. 

I decided to go all spring and created this cute layout with "3 Birds on Parade!" cartridge and one of my all time favorite crafting tools, my Cricut Imagine..

So, with that said here is my layout:


I printed everything onto white cardstock again.. but I really need to tap into my pattern paper stash since its getting bigger and bigger..LOL

but how's a bout a few close ups:

I pop dotted the title phrase onto the shadow cut.. 


I pop dotted all of the clouds onto this layout..

for supplies used:

Cricut Imagine
Cricut Craft Room DS

Cricut Cartridges:

3 Birds on Parade
Birds, Umbrella and Title phrase

A Childs Year:
Large photo mat background

George and Basic Shapes:
Large Circle

Create-a-Critter
Sun and clouds


white cardstock
white marker
foam dots
inks
chalks


fellow crafters.. That's my first Wednesday post for Whimsical Wednesdays during the come back..
Please stop by WW and check out what amazing projects our other design team members have created.


Hope everyone has a wonderfully scrappy week..
hugs

Card sketch-reveal SOUS

Happy Wednesday fellow crafters..
Its Card sketch reveal time again for us girls over at Stuck On U Sketches.. This weeks sketch was designed by me :).. I created this card for my niece who turned 18 last December..  She loved the card..
so, without further a do, here is the card I created for this sketch challenge:


I used some of my flowers on this card.. Which I haven't done in a while.. been busy concentrating on using my Imagine instead. This was such a nice change of pace...

How's about a few close ups:


for supplies used:

papers by: DCWV "all about girls!" stack
cardstock : white
flowers
string of pearls
MS edge punch
MS twig punch
MS butterfly punch
pearl halves
ribbon
Stamps by: Fiskars
StaZOn Ink

ok fellow crafters..  I've showed you mine, now you show me yours..LOL
and by that, I mean stop by SOUS, check out our sketch and submit to us your amazing projects..
Till next time ..
Have an amazing week crafting..
hugs

January 11, 2013

Home is where the Heart is-die cut challenge SOUS

Aaaaaaand here we go ladies.. Our very first Die cut challenge 2013..  The month of January was my month to create the sketch's and come up with some great die cut challenges over at S.O.U.S. I decided on something a little different.. I love being creative and thinking out of the box (at times) and so, I decided to give this weeks die cut challenge a bit of  twist..  
So, our challenge was 
"SWITCH A ROO!".. 
Meaning, replace one letter in your title with a die cut.. How clever, yes...LOL
and so here is my take on our die cut challenge:


I had so much fun designing this layout.. and I once again created my own colors using CCR and the RBG codes..  Hard to tell its all white card stock ain't it...LOL
its really difficult to get a descent photo during this time of season here since we haven't seen the sun in months.. sorry about that :)

I stamped some pink swirls around the edge and then added some white marker dots to them.. 
layering a green piece of card stock which I edge punched.. 
How's about a few close ups:

Here you can see I actually did some dry embossing on the die cut. I love the heart shaped.. it looks so elegant.. 

for my title, I added layered hearts to replace the "O".. plus, I haven't used the font of the Storybook cartridge in a really long time..

My doves.. did some dry embossing on those as well as the little hearts..

The cute little house, I thought it looked great as a letter "A"..

and finally my cute little couple..  I did a lot of inking on this layout, but I strongly feel that it really brings out the best in your die cuts.. and it does't take that long to do..
I will try to rummage through our photos and find of hubby and I for this layout.. 

for supplies used:

Cricut Craftroom
Cricut Imagine

Cricut Cartridges:

Sweethearts:
house, couple and doves

Songbird:
background marquee

Plantin Schoolbook:
hearts and title font

Storybook:
Title font

White card stock
MS deep edge punch
white marker
foam tape
chalks
stamp
ink

alright fellow crafters.. That's my Friday post for this week..Do stop by S.O.U.S and check out what amazing layouts our DT members have created..
I hope everyone has a scrap-tastic weekend..
hugs

January 4, 2013

Whimsical Designs is back!!


I have some awesome news for  you...
I've rejoined the Design Team at
WHIMSICAL WEDNESDAYS  
and were picking up from where we left off  starting on January 16th!  

You are going to LOVE the new Design Team and fun challenges that Stephanie has lined up, so stop by my blog or whimsical Designs to see the new Design Team line-up. 
  But for now, come check  out Whimsical designs and Stephanie has a great give away..
 So, make sure you come stop by on January 16th at Whimsical Wednesdays for some fun!  
hugs

Snow Angel-Sketch reveal S.O.U.S

I'm so psyched its Friday and I get to share my first layout of 2013!!
us girls at S.O.U.S have our first layout sketch of the year to share with you and it was created by me.. I had a lot of with this one, the sketch and layout..
Not sure how many know, but my daughter got herself a horse about a month or so ago.. He is our old man at the young age of 25 and he will get to spend his retirement days in my daughters good hands.. She has a lot of experience with horses and has fallen head over heals in love with him.. He is certainly a big boy..

So, I'm going to try to keep this post short and sweet :) and let you all get to the good stuff...


I once again created my own papers with my Imagine and RGB codes I got from this photo:

I used the 2 purples, blue and green. 
if you want the RBG codes, here they are:

                    R:       B:       G:
Green:          214    235    116
  Blue:           204    230    222
Light purple:    225    222    231 
Purple:        186    177    198 

 if you use CCR and/or a Cricut Imagine and you want to use the colors, just fill in the color codes where you would add the color to your cut.. Its super simple!!
Here is a pic of where you can switch the colors:


and then how about a few close ups:

The title phrase is from "Winter Frolic" cartridge


The birds are also on the "winter Frolic" cartridge.
I added two tiny pearl halves to the tops of the hats..


The gorgeous horse is on the "Winter Woodland" cartridge, the white flourish is from "Home Decor" and the large background image is off the "Sentimentals!" cartridge..

Here you can see the colors better, plus the tiny snowflakes which I added some tiny pearl halves to, they are on the "Winter Frolic " cartridge.. I actually created the striped paper myself and then printed it.. 


Ok fellow crafters.. I hope you found this post helpful and if you're not exactly sure how I added the color codes, please don't hesitate to ask me.  You can email me at nannescreations@hotmail.com and I'll be more than happy to explain it to you better.. 

I won't list the supplies used this week since I mentioned the cartridges below the close ups and then its pretty much just white card stock and pearl halves..distress ink and foam tape..LOL

That's my first layout post for 2013 and I'm so excited you stopped by today to check it out..
Do stop by S.O.U.S and check out what our amazing design team has created with this weeks sketch and do play along..
I hope everyone has a scrap-tastic weekend..